How I Mastered My Renovation Budget Without Losing Sleep
You’ve picked the tiles, chosen the paint, and finally decided on an open kitchen—but then reality hits: the budget’s falling apart. I’ve been there, staring at spreadsheets, overwhelmed by surprise costs and payment delays. What if you could plan your home renovation like a pro, with a clear system that keeps your finances steady? This is how I built a smart, stress-free strategy to manage my renovation funds—without cutting corners or maxing out cards. It wasn’t about having more money; it was about using what I had with purpose, clarity, and control. Through trial, error, and one major financial scare, I discovered a method that transformed chaos into confidence. And the best part? It’s not complicated. It’s practical, repeatable, and designed for real life.
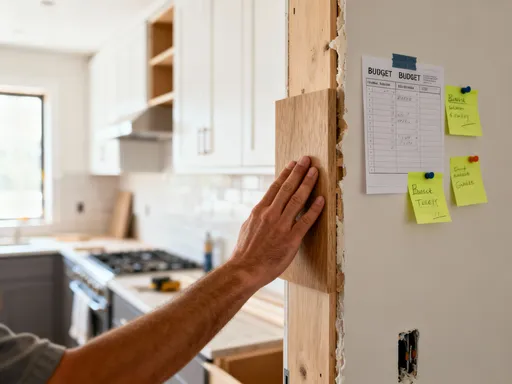
The Wake-Up Call: When My Renovation Budget Blew Up
It started with excitement. I had spent months gathering inspiration—Pinterest boards full of farmhouse sinks, sleek cabinetry, and hardwood floors that glowed in the sunlight. I had a number in mind: $35,000 for a full kitchen and bathroom renovation. That figure felt reasonable, based on a few online calculators and a neighbor’s casual comment about their own project. I believed I was prepared. But within two weeks of hiring my first contractor, that number doubled. The initial quote came in at $72,000. I remember sitting at my kitchen table—ironically, the very space I wanted to fix—with my hands shaking, heart racing, and a deep sense of panic rising. How could something I had planned so carefully go so wrong so quickly?
The truth is, most homeowners underestimate renovation costs not because they’re careless, but because they don’t account for the full scope. What I didn’t realize then was that my $35,000 estimate only covered visible upgrades—new fixtures, paint, flooring. It ignored structural elements, code compliance, hidden damage, and professional fees. Once the walls came down, we discovered outdated plumbing, subfloor rot, and electrical systems that hadn’t been updated since the 1970s. These weren’t luxuries; they were necessities. And they came with mandatory price tags. My emotional reaction was intense: frustration, shame, and a feeling of personal failure. But that moment became the turning point. I realized passion and vision aren’t enough. Without a financial framework, even the most beautiful plans can collapse under the weight of reality.
Why do so many renovation budgets fail? Studies show that nearly 70% of home improvement projects exceed their original estimates, with an average overrun of 28%—and that number climbs much higher for major structural changes. The triggers are predictable: lack of detailed planning, failure to include permits and professional assessments, and underestimating labor costs. But beyond numbers, there’s a psychological factor. We tend to focus on the finish line—the sparkling new space—without mapping the journey. We skip the hard conversations about trade-offs and delays. I learned that financial discipline isn’t about restriction; it’s about foresight. It’s about asking the tough questions before the demolition begins. That first shock taught me to stop reacting and start preparing. From that point on, I committed to building a system—not just for this renovation, but for every financial decision I’d make going forward.
Building a Financial Backbone: The Core of My System
After the initial shock, I knew I couldn’t continue winging it. I needed structure. I began by treating the renovation like a formal project, not just a home upgrade. That meant creating a financial backbone—a clear, organized system that would support every decision. The first step was separating my renovation funds from everyday finances. I opened a dedicated checking account, accessible only for renovation-related expenses. This simple act changed my mindset. Money in that account wasn’t flexible spending; it was mission-critical capital. I transferred a lump sum based on a revised, realistic budget, and committed to not touching it for anything else. This separation prevented the common trap of dipping into home improvement funds to cover grocery overruns or car repairs.
Next, I established spending zones. Instead of one large pool of money, I divided the budget into categories: structural work, plumbing and electrical, materials, labor, permits, and décor. Each zone had a fixed allocation, calculated using quotes, historical data, and contractor input. For example, structural repairs were capped at 25% of the total budget, while décor was limited to 10%. This zoning approach created accountability. If I wanted to upgrade the countertops, I had to find savings elsewhere—perhaps by choosing a less expensive backsplash or delaying the under-cabinet lighting. The zones also helped me track progress. As one phase finished, I could close that zone and move to the next, creating a sense of momentum and control.
Equally important was aligning money with project phases. I broke the renovation into clear stages: assessment and planning, demolition, structural work, rough-ins (plumbing and electrical), finishes, and final touches. For each phase, I defined what had to be completed before funds were released. This phased funding model ensured that money followed progress, not promises. It also reduced risk. If a contractor failed to deliver on time or quality, I could pause payments without jeopardizing the entire project. This method transformed my relationship with money. I was no longer reacting to invoices; I was guiding the flow. The financial backbone didn’t eliminate stress, but it replaced panic with planning. It gave me a framework to make decisions with confidence, knowing that every dollar had a purpose and a place.
Prioritizing Like a Pro: What Gets Paid First (And Why)
One of the most powerful tools I adopted was cost prioritization. Not all renovation expenses are created equal, and learning to rank them saved me thousands. I categorized every cost into three buckets: “must-have,” “should-have,” and “nice-to-have.” Must-haves were non-negotiable items required for safety, function, and legal compliance—things like foundation repairs, updated electrical panels, and proper insulation. These came first, both in planning and payment. Should-haves improved comfort and value but weren’t urgent—examples include double-pane windows, energy-efficient appliances, or additional storage. Nice-to-haves were purely aesthetic upgrades: designer light fixtures, imported tiles, or built-in wine coolers. These could be delayed or eliminated without compromising the project’s integrity.
This system allowed me to make smart trade-offs. Early in the project, I realized that upgrading the HVAC system would push me over budget. Instead of cutting corners on insulation—a must-have—I postponed the smart thermostat and high-end air filters, both should-haves. This kept the core systems strong while preserving cash flow. I also learned that timing matters. Paying for permits upfront was essential; delaying them could halt construction. But buying décor items six months in advance? That was a waste of capital. By aligning payments with urgency and impact, I maintained financial flexibility. If an unexpected cost arose, I could pause a nice-to-have without derailing the entire project.
Prioritization also improved communication with contractors. When I explained my payment hierarchy, they understood my constraints and could offer alternatives. For example, when hardwood flooring went over budget, my contractor suggested a high-quality engineered wood that looked identical but cost 30% less. That kind of collaboration only happens when both parties understand the financial priorities. This approach didn’t just save money; it reduced decision fatigue. Instead of agonizing over every choice, I had a clear filter: Is this essential? Does it affect safety or function? Can it wait? The answers guided me calmly through what could have been a chaotic process. Prioritization wasn’t about deprivation—it was about intention. It ensured that every dollar delivered maximum value.
The Buffer That Saved My Project (And My Sanity)
No matter how well you plan, surprises happen. In my case, it was a hidden water leak behind the bathroom wall that required pipe replacement and mold remediation. Another time, the local building department required an additional inspection that added two weeks and $1,200 to the budget. Without a buffer, these events would have forced me to pause the project, take out a loan, or cut essential work. But because I had built a 15% contingency into my budget from the start, I was able to absorb these costs without panic. That buffer wasn’t a luxury; it was insurance against the unpredictable.
Many homeowners skip the buffer, thinking it inflates the budget unnecessarily. But real-world data shows that unanticipated expenses are not the exception—they’re the norm. Industry experts recommend setting aside 10% to 20% of the total budget for contingencies, depending on the project’s complexity. For older homes or major structural changes, the higher end is wise. I chose 15% after reviewing similar projects in my area and consulting with a renovation advisor. That money was transferred into a separate sub-account, labeled “Contingency – Do Not Touch.” I treated it as sacred. Even when I had leftover funds in other categories, I didn’t reallocate the buffer. It existed for one purpose: emergencies.
The psychological benefit was just as important as the financial one. Knowing that I had a safety net reduced anxiety and prevented impulsive decisions. When the leak was discovered, I didn’t rush to hire the first contractor who answered the phone. I took time to get multiple quotes and choose the best option. The buffer gave me breathing room. It also protected my emergency savings. Without it, I might have dipped into funds meant for medical bills or car repairs, creating a cascade of financial stress. By treating the contingency as off-limits unless absolutely necessary, I maintained discipline. And when the project ended, I had 3% of the buffer left—unused. That remainder was transferred to a home maintenance fund, closing the loop on financial responsibility. The buffer didn’t just save the renovation; it preserved my peace of mind.
Managing Contractors and Cash Flow: Timing Is Everything
One of the biggest financial risks in any renovation is misaligned payments. Paying too much upfront gives contractors less incentive to finish well or on time. Paying too late damages trust and can lead to work stoppages. I learned this the hard way when an early payment led to delayed progress and poor communication. From that experience, I developed a milestone-based payment schedule that balanced fairness and financial control. Each payment was tied to a specific, verifiable stage of completion—no progress, no payment.
The structure was simple. I divided the project into five key milestones: project kickoff (10% deposit), completion of demolition and structural work (25%), rough-ins approved by inspector (25%), finishes installed (30%), and final walkthrough with punch list completed (10%). Each milestone required documentation—photos, inspection reports, or signed checklists—before funds were released. This system ensured accountability. It also improved quality, as contractors knew their next payment depended on meeting standards. I avoided front-loading cash; the largest single payment came after rough-ins, when the most critical systems were in place and inspected.
This approach also strengthened relationships. Contractors appreciated the clarity. They knew exactly what was expected and when they’d be paid. One electrician told me it was the most organized project he’d worked on in years. Transparency built trust. I also included a clause that allowed for partial holds if minor issues were found—say, a misaligned outlet cover. That way, I could release most of the payment while ensuring corrections were made. Managing cash flow this way protected my budget and maintained positive working dynamics. It turned what could have been a transactional relationship into a collaborative partnership. And by aligning money with progress, I ensured that every dollar earned its place in the project.
Tracking Without Obsessing: A Simple System That Actually Works
Early on, I tried tracking every expense in a complex spreadsheet with formulas, graphs, and conditional formatting. Within a week, I gave up. It was too time-consuming, and I felt overwhelmed. I needed something simpler—something I could use consistently. So I created a visual tracker: a large laminated chart on my fridge with columns for each spending zone, a running total, and a color-coded bar showing how much of the budget was used. Every time I made a payment, I updated it with a dry-erase marker. It took less than a minute, and it gave me instant clarity.
This tracker wasn’t about perfection; it was about awareness. Seeing the numbers grow in real time helped me spot trends early. When the materials column started climbing faster than expected, I paused and reviewed upcoming purchases. I discovered I was planning to buy all tiles at once, even though installation was months away. By staggering orders, I freed up cash and avoided overspending. The visual format also reduced anxiety. Instead of wondering, “Are we over budget?” I could look at the chart and know. Green meant on track, yellow was caution, and red meant I needed to adjust. This simplicity made tracking sustainable.
I also reviewed the tracker weekly, not daily. Obsessing over every dollar leads to burnout. A quick weekly check-in was enough to stay informed and make timely decisions. I paired this with a monthly reconciliation—comparing actual spending to the original plan and adjusting allocations if needed. For example, when labor costs came in under budget due to a contractor’s efficiency, I moved the surplus to the finishes category for a higher-end vanity. This flexibility kept the project moving without violating the overall budget. The system worked because it was easy, consistent, and designed for real life. It turned financial management from a chore into a quiet source of confidence.
The Long Game: How This System Benefits More Than Just Renovations
What started as a solution for one stressful project became a lifelong financial philosophy. The habits I developed—planning with precision, prioritizing ruthlessly, building in buffers, and tracking with simplicity—now shape how I handle every major expense. When I planned a family vacation last year, I used the same framework: a dedicated fund, spending zones for flights, lodging, and activities, and a 10% buffer for unexpected costs like weather delays or medical needs. The trip came in under budget, stress-free.
When I bought a new car, I applied the milestone model. Instead of one large payment, I structured it in phases: research and selection, test drives and negotiation, financing approval, and final purchase. Each step had a budget and a decision point. This prevented impulse buys and ensured I got the best value. Even saving for my daughter’s education now follows the same principles—clear goals, prioritized contributions, and regular tracking. The renovation didn’t just improve my home; it improved my financial literacy.
More than that, it gave me confidence. I no longer fear big financial decisions. I know I have a system that works. I can adapt it to any goal, whether it’s home maintenance, medical expenses, or retirement planning. The core lesson is this: financial control isn’t about having more money. It’s about making thoughtful, intentional choices with the resources you have. It’s about building systems that protect you from chaos and empower you to act with clarity. My renovation taught me that peace of mind isn’t found in a perfect kitchen—it’s found in knowing you’re in control. And that’s a return on investment no tile or countertop can match.